This document takes you through the process of preparing for and installing Fedora Linux, release 19. There is just enough difference between the installation of Fedora 18 and 19 to justify a separate document for Fedora 19. The majority of this difference is in the area of disk partitioning, but there is also a significant difference in the network interface naming conventions.
You should also refer to the Fedora Documentation web site for documentation specific to the Fedoras release you are installing. The Installation Guides for each release contain a great deal of information that is not covered here.
On this DataBook web site, Installation of Fedora 15 through 17 is covered in Installing Fedora Linux 15 through 17, and the Installation of Fedora 18 is covered in Installing Fedora Linux 18.
A minimal system does not have any type of graphical interface and is an excellent platform for use as a firewall, router, or any type of server such as a web, FTP or email server, but we want a bit more than that. This document will install a basic system with the KDE Desktop. Any additional functionality required later can be added as it is needed.
The partitioning for this system will include a single standard EXT4 partition for /boot which cannot be part of a Logical Volume. The rest of the hard drive will be used as a Physical Volume (PV) on which Logical Volumes will be created for the rest of the filesystems. Not all of the PV will be used so that free space can be used later.
Note: This document depicts a sample installation and is intended for learning purposes only and is not intended for production use.
You may use this document to develop your own installation procedures that meet the needs of your environment.
1. Insert the Fedora Linux installation DVD provided by the instructor into the DVD drive of your computer.
2. Reboot or turn on the computer.
3. When the Fedora 19 initial installation menu is displayed, use the Up arrow key to select Install Fedora and press Enter. You could run the media test by just pressing the Enter key but that should not be necessary.
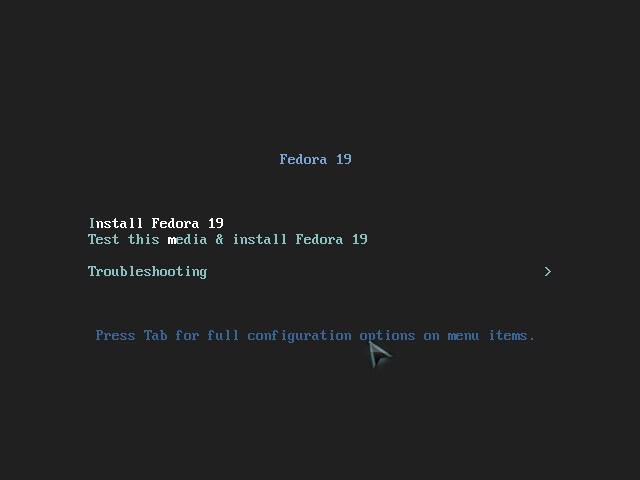
Fedora 19 Initial text menu.
4. On the Fedora 19 installation Welcome screen, below, English is already selected as the installation language, but you should check the box labeled, Set keyboard to default layout for selected language. Then click the Continue button.
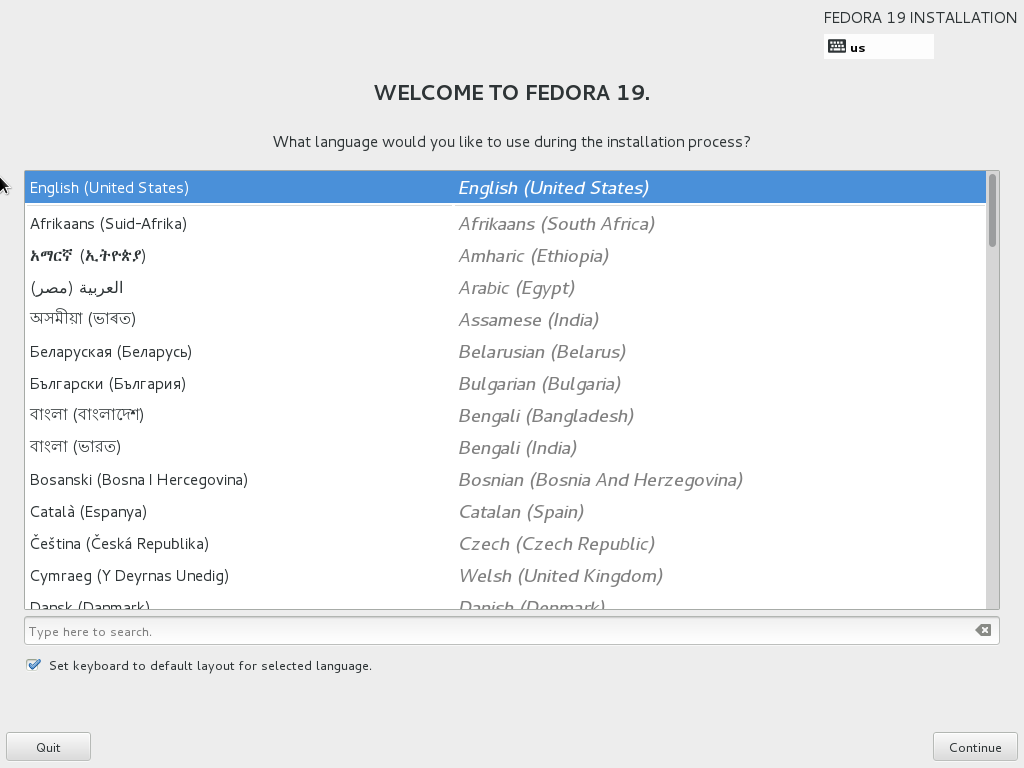
English is already set as the installation language. Click on the checkbox to set the keyboard layout.
5. The main installation menu, titled INSTALLATION SUMMARY is displayed as shown below. This menu is the central hub from which you can select sub-menus to customize the installation.
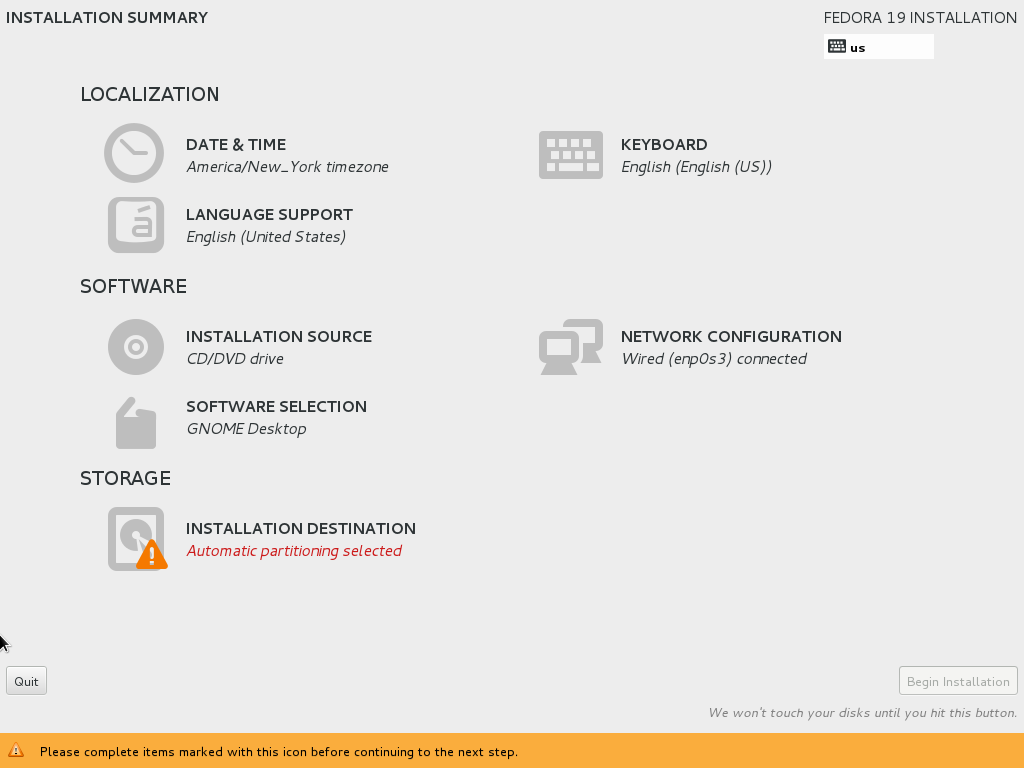
Select the sub-menus from the Installation Summary menu to customize the installation.
Note the yellow banner across the bottom of the menu and the yellow warning icon next to the Installation destination sub-menu. You will not be able to proceed with the installation until all warnings are eliminated.
Most of the sub-menus do not need to be selected for a vanilla installation, for this lab project, we will take some time to look at each. There are a few things you will need to change for this lab project.
6. Look at the Date & Time sub-menu. You can click on the desired time zone on the map, or you can select the region and city from the drop-down selection fields.

Select the desired time zone from the map if it is different from the one selected by default.
When finished on this menu, press the Done button in the upper left corner.
7. The Installation Source sub-menu allows you to choose between the install media from which the system was booted, an ISO file on the hard drive if one is available, or a mirrored repository on the Internet. The most common is the default, from the auto-detected installation media that you booted from. It is not necessary to change anything on this sub-menu.
8. You will need to make some selections on the Software Selection sub-menu. Select the KDE Plasma Workspace.

Select the KDE Desktop from the Software Selection sub-menu.
For this sample installation, which is not about applications, it is not necessary to select any of the add-on software on the right side of the menu, but in a real-world environment you may wish to install LibréOffice and other applications.
When finished with this sub-menu, click on the Done button.
9. The Installation Destination sub-menu is the one that will always need some attention. Select this sub-menu and you will see a list of available disks on which you can install Fedora. For this installation only one hard drive is installed so it should already be selected. If other hard drives were available they would be pictured on this page and be available for you to select.

The Fedora 18 Installation Destination sub-menu. Select the hard disk drives you want for the installation.
Press the Done button in the upper left corner of the screen to configure the partitions. Notice that the Continue button that was present in the Fedora 18 installation is no longer present. Also note that this Fedora 19 Installation Destination page has a separate Add a disk button for special disk types such as NAS and SAN that was not present on the Fedora 18 page.
10. At this point you are presented with the screen below, which allows you to select either the default partitioning scheme or a custom configuration. For many hosts, if enough free space is available, the default option is fine.
Due to the fact that the hard disk drives on many computers have been used before there may be little or no available space, or a large portion of the space has been previously partitioned. So in order to delete all existing partitions you will have to reclaim all of the used space from the disk.

To perform manual disk partitioning click on the Custom partitioning button.
The Partition scheme button is defaulted to LVM which is the best choice for most environments. Other options are “Standard partition,” which gives up all of the flexibility of a Logical Volume Management partitioning scheme, and “BTRFS,” which is an advanced B-Tree file system that still has some bugs in it. LVM is definitely the best choice here.
For this sample installation project, check the box, Custom partitioning button. Do not check the Encrypt my data box.
11. The Manual partitioning menu displays existing partitions and allows you to delete them. The Illustration below, shows the existing disk partitions in the expandable list entitled, Fedora Linux 19 for x86_64. Click on the triangle twistie to expand this list.
Click on the triangle “twistie” to open the list of existing partitions.
Click on each partition in the expanded list of existing partitions and click the Minus (–) sign on the toolbar to delete each existing partition.
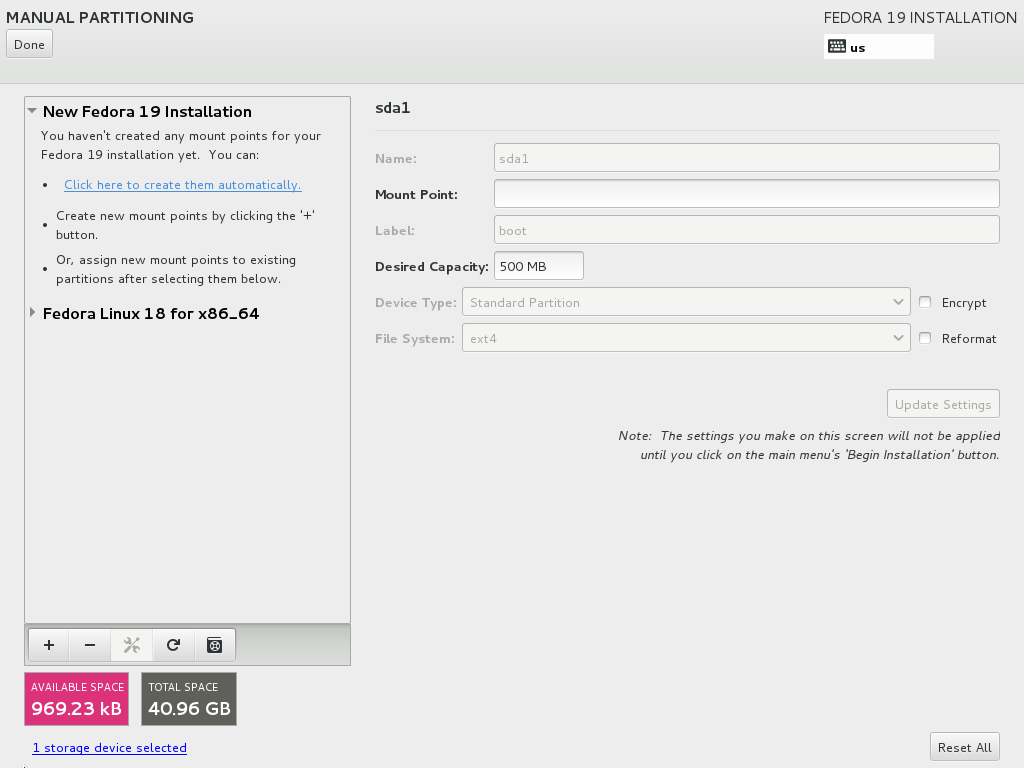
12. After deleting the existing partitions click on the toolbar Plus sign (+) to create new partitions. First create a /boot partition of 500MB in size as an EXT3 partition. The /boot partition cannot be a logical volume; it must be an EXT3 or EXT4 file system on a standard Linux partition of type 83. The Anaconda installer is smart enough to create the /boot partition as an EXT4 standard Linux partition.

Creating the /boot partition.
Click on the Add mount point button to add the partition to the list. No partitions are actually created until you click on the Finish Partitioning button, but do not do that yet.
13. Type “boot” in the Label field and click the Update Settings button.A label can be important in identifying partitions and logical volumes when performing problem determination tasks.
Notice that the device type is a standard partition and not a logical volume. This is normal and correct for the /boot partition because the /boot partition cannot be a logical volume.

Type “boot” in the Label field and click the Update Settings button.
After adding the filesystem label, click on the Update Settings button to complete configuration of the /boot partition.
14. Now click the (+) button on the partition toolbar and create the / (root) Logical Volume (LV) with a 5GB size as shown below. Note that you can specify 5 GB as 5G, 5GB, 5000, 5000M, or 5000MB. Note that Anaconda automatically creates all partitions except /boot as EXT4 filesystems on a Logical Volume (LV)
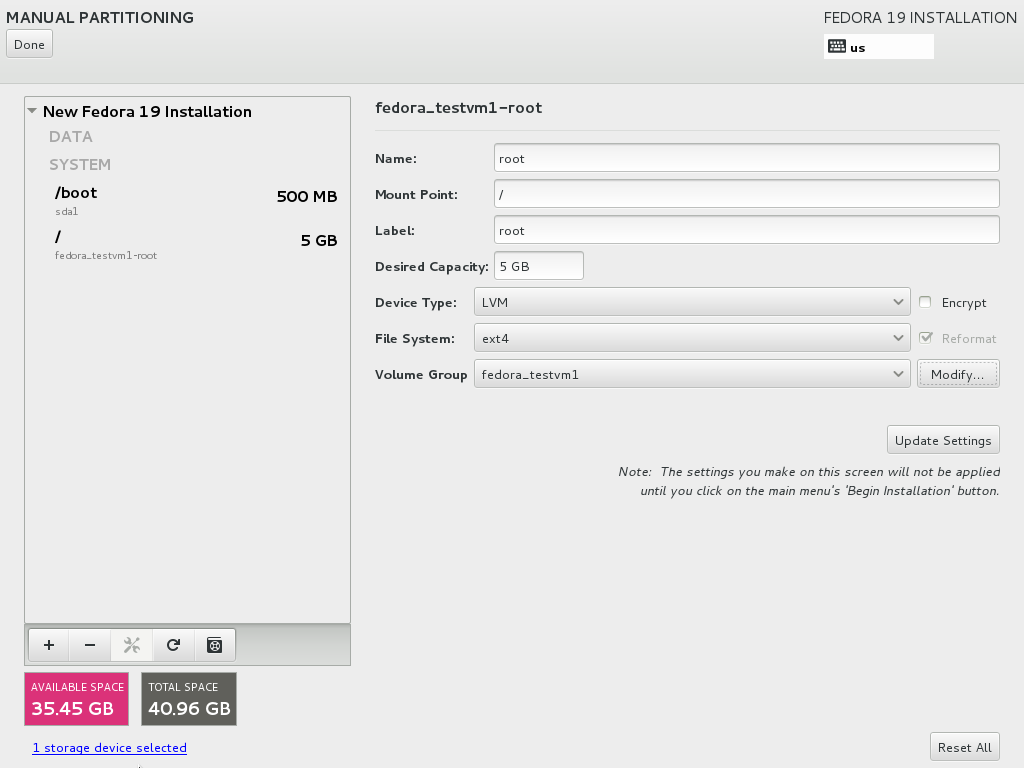
Create the root (/) partition with a 5GB size.
Add the “root” label then click on Apply Changes to complete configuration of the / (root) partition.
15. At this point you can — and should — modify the Volume Group (VG) to take up all of the space on the hard drive as shown in the figure below. This is a more efficient use of disk space than waiting until after the installation is completed to create a new partition out of the unused disk space, and then create a Physical Volume (PV) on top of the partition and then add that PV to the existing Volume Group.

Increase the size of the Volume Group to the maximum possible size to make the most efficient use of disk space.
Do this by clicking the Modify button next to the Volume Group name. Choose As large as possible for the Size policy and then click on the Save Button.
To save all of these changes, click the Update Settings button.
16. Now create the rest of the required Logical Volumes using the table below using the same steps you did to create the / (root) partition. This table shows all of the partitions and Logical Volumes you should have when you are completed including the /boot partition which was previously created, as well as the Physical Volume (PV) and Volume Group (VG). Note that neither the Physical Volume nor the Volume Group is shown by the manual partitioning menu in the table of partitions on the left.The automatically generated Volume Group name is shown on the drop-down on the right side.
Each new mount point you create will appear in the “New Fedora 19 Installation” partition list.
Note: This is a sample minimal filesystem configuration for this sample installation. When installing Linux you should partition the filesystems according to the requirements for the individual systems.
-
Mount Point
LVM
Volume Name
Filesystem Type
Size
/boot
No
EXT4
500M
PV
Physical Volume
23GB
VG
Volume Group
Maximum Size
/
Yes
root
EXT4
5GB
/home
Yes
home
EXT4
2GB
/tmp
Yes
tmp
EXT4
2GB
/usr
Yes
usr
EXT4
10GB
/var
Yes
var
EXT4
2GB
NA
Yes
Swap
Swap
2GB
Table 1: Filesystem and Volume mount points and sizes. Note that, with Fedora 19, the Volume Group is sized automatically by the sizes of the defined Logical Volumes. Everything else is left as free space in the unless you explicitly modify the VG size as discussed above.
It is necessary to type in the “/tmp” mount point as it is not one of the available selections.
This uses about 23.5.5 GB of space. I have installed a full version of Fedora on a NetBook computer with the KDE Desktop along with LibréOffice, Thunderbird, Firefox and other application programs in about 8GB of disk space.
Note that the Swap partition does not have a mount point and is a special swap filesystem type.
17. When you have completed configuring the partitions, click on the Finish Partitioning button. Then click on Accept changes on the window that displays a list of file system changes to be made. Not that Fedora 19 does not modify the hard drives until you click the Begin Installation button on the main installation hub window.
18. There is no need to make any changes in the Keyboard sub-menu unless you are setting up a host for a non-English environment. You can take a look at this sub-menu if you like.
19. The network to which your host is attached probably has a DHCP server and, for now, you do not need to make any changes to the networking configuration. However you should look at this sub-menu to see what it looks like and to verify that the network configuration is as you expect it to be.
Notice that the Hostname, IP Address, Subnet Mask, Default Route and Name Servers have all been provided by the DHCP server. If there is no DHCP server, you may have to use static addressing and provide valid gateway and DNS server entries.

Check the DHCP network configuration or manually configure it.
Verify the network configuration on this page. If it were necessary to perform a manual configuration, you would click on the Configure button to open the Network Configuration menu.
The information in the above illustration is for the VM used to create this project.
When you have finished verifying that the network configuration is correct, click on the Done button to return to the main installation menu. Do not change anything on this menu!
20. On the main menu page, Installation Summary, click on the Begin Installation button to begin the actual installation. At this time you will need to set the root password. Use a suitable password for your root password. Although you can do so here, it is not necessary to create another non-privileged user at this time, that can be done during the post-installation phase.

Fedora 19 Installation progress. You must set the root password here. You can also add a non-privileged user.
21. When the installation has completed, remove the installation medium and click the Reboot button that will be displayed in the lower right corner of the screen.