Note: You cannot login as root using the GUI desktop login. You can only login as a non-privileged user using the GUI.
After rebooting immediately following the completion of the installation of all Fedora releases you are forced through the initial setup sequence. This sequence prompts you to accept the license and allows you to create a single, non-privileged user account to be used for GUI desktop logins. You will create one non-root user at this time.
The student user and password used in this example should not be used in a production environment. Be sure to use a user ID and password appropriate for your environment.
- The first screen is the Welcome screen. Click the Forward button.
- Click the Forward button on the License Information screen. Notice that you do not have to scroll through the entire thing to allegedly “read” the GPL before you can continue. A copy of the license is available from the URL on the License Information page.
- Enter the data to create a new user, “student”, with a password of “lockout” on the Create User page.
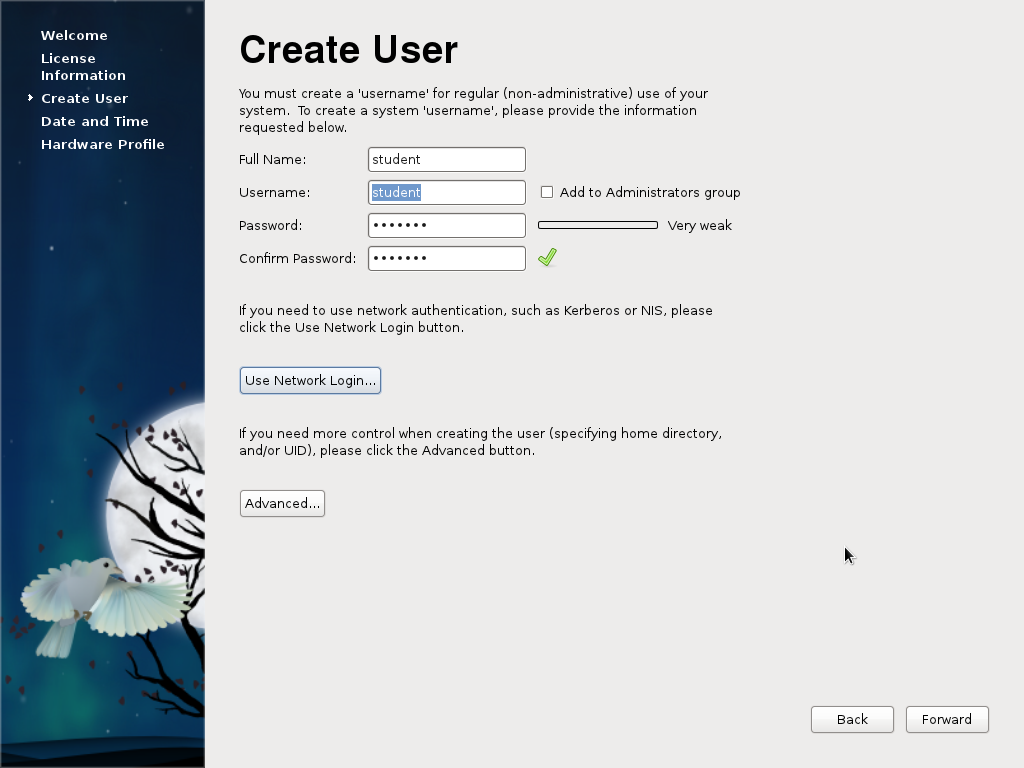
Illustration 1: Create the “student” user.
Then click the Forward button. This will be your non-privileged user account.
- Select Synchronize date and time over the network on the Date and Time page.Then click the Forward button. It will take a moment for the time on your local computer to synchronize with the Fedora time servers.
- Fedora 15 through 17 also have a hardware profile page that Fedora 18 does not. Check the Send Profile radio button on the Hardware Profile page and click on the Finish button. This sends the profile of your computer hardware and information about the software installation to the Fedora Project. This information was used to create a list of hardware that works well with Fedora. It has been discontinued with Fedora 18 and above.